Showing posts with label how to make. Show all posts

Wednesday, 1 May 2013

Make - up-cycled vintage furniture


Hello Wednesday, it's nice to see you looking so well! Today I am sharing a little project I undertook yesterday, I had a couple of hours spare and this has been waiting to be done for an age. When I was the in-store VM at Cath Kidston I had so many amazing vintage props to work with, many of which were also for sale and over the 3 years I was there I became very fond of this tatty old milking stool. I could see that with a little love and attention this insignificant piece of 'furniture' could have a whole new lease of life. The stool was handed over in to my care and now sits as a side table and occasional prop at craft markets, it has also finally had the make-over it deserves. Here's what I did...

I have seen lots of two tone furniture on Pinterest of late and thought this would work well on the stool so I grabbed 2 tester pots of paint from the local DIY store and a couple of cheap brushes. The paint I used was Cuprinol garden shades as it is meant for wood. I chose to use Daisy White for the bottom half and Coastal Mist for the top (I am always drawn to blue shades), and to highlight the small band around the leg I used a light gold acrylic art paint. If you decide to have a go at this on something yourself you may find a primer is needed, I didn't use one but I did sand the wood thoroughly before I started. It did take several coats to get the look I wanted but I am so pleased with the result. What do you think?


Have you rescued anything unloved before?

Friday, 22 March 2013

Make - mood board makeover


I recently read this great 5 minute DIY post on the craft blog creme de la craft on how to pretty up your bulletin board with a glue gun, pins/tacks and some artificial flowers, so simple but incredibly beautiful. I am intending to do this as my studio walls are covered in pins that would be much improved with some spring flowers.
However, I haven't yet found any flowers to use but I did find these cute little crochet bits at my local haberdashers, The Makery Emporium in Bath, which I felt would make a nice starting point for this project.


Take a look at the post for yourself and see what you can do too.

Friday, 8 March 2013

Make - paper flowers


Good morning, I hope you are looking forward to a great weekend, I am as I will be attending another great market this Sunday at Green Park Bath and as it is Mothering Sunday here in the UK there is going to lots of wonderful things going on. Magpie and I markets are joining in the fun with a vintage tea party, live music and lots of lovely stalls for you to treat mum. Come along if you can, we will be there between 10am and 4pm.

As Mothers Day is upon us I thought I would share a little make with you, it is a great thing to do with your kids so they can make a card for granny.

What you need...


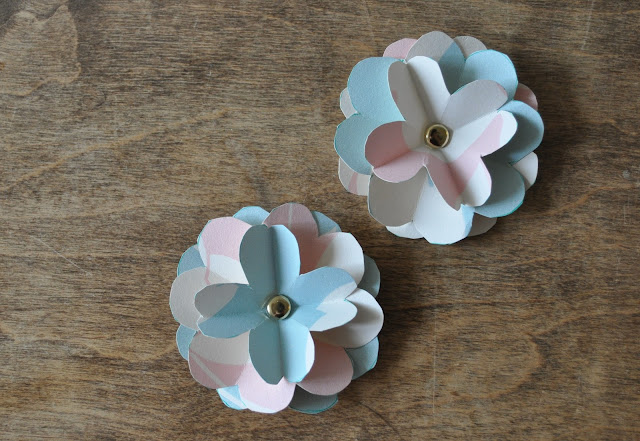
A template or two flower shapes - one slightly smaller than the other, some pretty paper, a blank card and envelope, some brads and any other embellishments you may want to add.


Draw around your template on to the paper, you will need 2 large cutouts and 1 small for each flower.


Next you need to fold the cutouts, on the black lines fold inwards so the pattern is on the inside and on the white lines fold in the opposite direction so that the pattern is on the outside. Open out and your 'petals' should now be 3 dimensional.


Layer the cutouts so the smallest is on the top and carefully push a brad through the centre and open it at the back to secure. Pinch in the folds to make them more defined.


Finally move the layers so the lay in alternate directions and give a more 3D effect. Use to decorate your greetings card.

I apologise that the photo's aren't great but they were taken on a very grey and rainy day!

Have you anything nice planned this weekend?

Tuesday, 26 February 2013

A little dress making


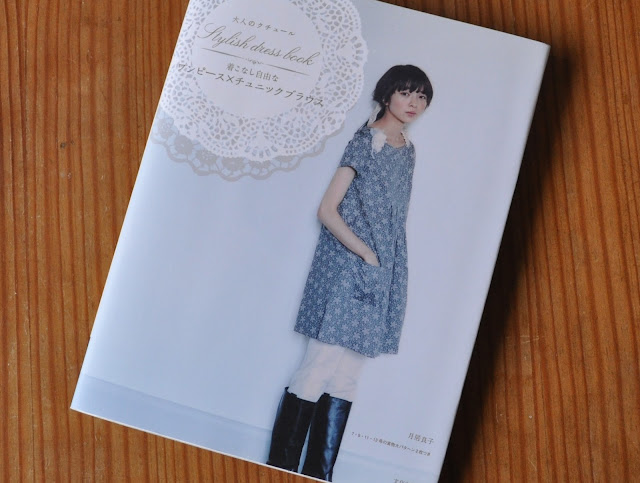
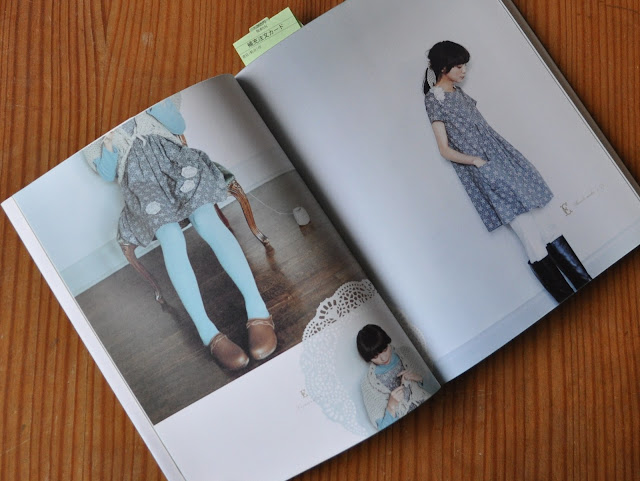
OK so when it comes to sewing of any kind I am a bit ropey, don't get me wrong I love it and I can just about pull off a lovely tote or toy bunny rabbit, but anything more technical and I have to call in Mrs A. And step in she will have to, as this week I took a delivery of this lovely pattern book to make some tea dresses out of a bunch of beautiful dress fabric I acquired whilst working for Cath Kidston. The fabric is rayon and the prints are of course very retro/vintage in style and would have been used as tea dress material by Ms. Kidston. I look forward to showing you the results when we are done (it may be a while yet).

Oh and one other thing... the book is entirely in Japanese so good luck mother!


 Stylish dress book ISBN978-4-579-11185-5

How are you with dress making?

Friday, 25 January 2013

Make - fabric covered frames


For absolutely ages now I have been thinking what to do with a whole heap of fabric scraps I have saved, they are too small to make anything substantial with but are too pretty to throw away. Then inspiration struck! A while ago I picked up some cheap wooden frames from B&Q for my market stall, I stamped them with descriptions and used them to display my silver jewellery. But I have since upgraded the frames and these older ones are going to waste.
So what better way to use up my scraps than to cover the frames and make them into a colourful patchwork frenzy to surround some photographs of my friends and family.

I used copydex to stick the fabric as it doesn't show through and it shouldn't yellow the fabric like some glues can. This is such a simple way to dress up anything that needs a little attention, why not have a go yourself. I will probably put some different pics in to hang them (these clearly don't fit!) but I had them to hand to show you the results.


Tuesday, 8 January 2013

Make... An Order Board


Hello friends, sorry about the quality of photo's in this post but I only had my phone camera and poor lighting available to record my make today.
I am very excited that I am writing this on my brand new MacBook Pro, but this wondrous machine has highlighted how much I need improve my photography skills!

For my first make of 2013 I am bringing together functionality with the fun and frivolous. I was given these stag pegs (below) for Christmas and I am going these on a design memo board that I have in my workspace, but they have also inspired me to make another board for my order list (I do like my space to be organised).


So, what is needed to make a clothes peg memo board? Well clothes pegs are a good start!

6 wooden pegs
selection of washi tape
vintage buttons
piece of wood
white emulsion paint
ink stamps
staze-on ink
hot glue gun
nails/hooks and string for hanging


The first thing you need to do is give the wooden board a wash of the paint and put it to one side to dry.
Whilst this drying you can decorate the pegs, do this by sticking your tape to the flat edge of one side of the pegs and trimming to a neat flush finish. You can then use the hot glue gun to stick on your buttons,  layering smaller ones on to larger ones to give some nice detail.


Once your paint is dry you can ink stamp whatever you want written across the top of the board, I chose the word orders with some added detail of a button image I have on a stamp. Staze-On ink really is the strongest you can buy, so be confident of your design as it's not coming off once you have stamped it!


Finally hot glue gun your pegs along the bottom edge of your board, tap your pins or hooks for hanging on to the back, attach your string and voila, you are done.

Have fun xx

Friday, 21 December 2012

Busy With Bakes & Makes

I'm very late writing up today, but I can't complain as I've been fulfilling some last minute Christmas orders!
I have also done some baking today, whipping up a batch of chestnut and brandy jam and my first round of marzipan mince pies. I thought you might like the mince pie recipe for any easy last minute bakes this weekend...

Ingredients

220g plain flour
100g unsalted butter, cubed
Pinch of salt
3 tbsp cold water
Mincemeat mixture
Marzipan

Method

• Preheat oven to 200*c/gas mark6

• Sift flour and salt into a bowl. Rub in the butter to create a rough sand texture.

• Sprinkle water in to the bowl and lightly work mixture into a ball.

• Wrap in cling wrap and chill in the fridge for 30 minutes.

• Roll out to a thickness of approx. 3mm and cut out enough circles to fill your greased tray (usually 12).
Press the pastry discs into the tray.

• Roll the marzipan out thinly and place a small disc in each pastry cup. Spoon a teaspoon of mincemeat on top of the marzipan.
For the lids I cut star shapes from the rolled out pastry and placed them on top of the mincemeat.

• Finish with a milk wash and bake for 20 minutes, or till golden.


Enjoy xx

Thursday, 6 December 2012

Birds, Butterfies & Baubles


I have been making some little stocking fillers this week using some oven bake clay and ink stamps. Have a go at making some holiday ornaments yourself, just grab some clay and impress your favourite images in to it with permanent ink. Make a hole using a straw, bake according to the instructions and hang with pretty ribbon or twine... Or if you are able, come along to the Bath Artisan Market this Sunday where I will have some of these brooches for you to purchase.

What decorations have you been making this week? xx

Friday, 16 November 2012

Little Photo Shoot In Memory Lane

Most of you will be aware of the blog A Beautiful Mess and I'm sure like me you are often inspired to make and do by their wonderful posts and tutorials. Recently there was a beautiful post showing how to use old family photographs to decorate the back of a bookshelf. This got me looking out some of my family portraits, particularly the ones of my grandparents. I forgot how beautiful they are and when I saw them in front of me I decided on an impromptu little photo shoot.


By the way the fabric below is from Millie Moon in Frome and The Makery Emporium in Bath, not sure what it's going to be yet but I'm totally smitten with it!


I think I would like to put some of these old photographs in to a printed book, I did this with some of my uncle last year for my dad's Christmas present. Sadly my uncle Rich (one of my dad's 4 older brothers) passed away in 2011. Richard had been sent to the Malaysia conflict during his national service in the 1950's and had sent over 100 letters home, so along with some wonderful photographs he had taken over there I scanned and collated them in to a memory book for my dad. 
Here are a few of the photo's...


Hope you liked my trip down memory lane xx

<a href="http://www.bloglovin.com/blog/4259503/?claim=te3kfr4ctbs">Follow my blog with Bloglovin</a>

Thursday, 8 November 2012

Fireworks, Flea Markets & Fabric Labels


Over the last week I have been a little miserable as a vicious cold took hold, but we can't let these things stop us can we! I didn't manage to get to the big bonfire party in Bath, but there was plenty to see from the garden and I lit a sparkler or two to feel a part of it. I do love fireworks, it's the wrapping up all cosy and warm and being with lots of others all enjoying the same experience.


I have also managed to do some flea market shopping of late, picking up some brilliant finds to decorate a few spaces and to use as props for my Silver Shed booth (remember to come along to The Bath Artisan Market this Sunday at Green Park Station 9.30-4pm). I am particularly in love with the 1930's German sleigh I found in pretty Malmesbury. The enamel bowls are perfect for holding my jewellery goods, there is a song sheet which will be framed and a mini milking stool and shoe last for... um, well... well for no reason, but why not hey!


Lastly I need to share with you my new love... printing on fabric at home. Looking for some way to label my silver quote rings I started thinking about printable fabric sheets, these little gems enable you to design and print your own fabric with an ink jet printer. Perfect for text too, but just remember to mirror image!
It is quite pricey but looking on line I came across many people raving about freezer paper and how it allows you to make your own sheets by ironing it to the fabric and giving it enough structure for the printer. Sadly I soon realised this is an American product and tricky to find in the UK, but look on line and in quilting shops (it's popular for applique work) and you will eventually find it, and plenty of tutorials (here is one on the Instuctables website). Have some fun with it!


xx

Wednesday, 12 September 2012

September Love


What a lovely start to the autumn season! Those who know me well, know that September is my favourite time of year. The light around Bath is beautiful and catches the Bath stone in a way that makes it glow golden.
During this season, when I'm not working away in my shed, I can usally be found donning my cute Joules french navy wellies (they tie with a gossamer bow, what's not to love?) and heading out to the fields to forage.

haw berries
elderberry

There is nothing better than finding trees and hedges groaning under the weight of fruit that has been soaking up the sun all summer. Now, this year hasn't been great for fruit and veg (wild or cultivated) so the harvest is minimal, but this week I found a great selection for using good old Pam 'the jam' Corbins hedgerow jelly. You can basically put in any hedgerow edibles to capture the flavours of autumn and for mine I found elderberries, sloes, haws and of course blackberries. To add pectin and bulk it out a bit I also used some cooking apples. Below is the recipe taken from The River Cottage handbook...


Will make seven or eight 225g jars
1kg foraged crab apples (or cooking apples)
1kg mixed hedgerow berries
Around 900g granulated sugar
Pick over your fruit, removing stalks and leafy bits and rinsing the berries. Don't peel or core the apples, just chop them roughly. Place all the prepared fruit in a large saucepan with 1.2 litres of water.
Bring gently to simmering point. Simmer until all the fruit is soft and pulpy. Remove from the heat.
Turn the contents of the pan into a scalded jelly bag or muslin cloth. Leave to drip into a bowl overnight. the jelly will turn cloudy if you squeeze the juice through, so just let it drip at its own pace.
The next day measure the juice - you will probably have about 1.2 litres, though this will depend on the berries you used. For every 600ml of juice, allow 450g of sugar.
Put the juice in a large pan and bring slowly to the boil. Add the sugar as it comes to the boil. Keep stirring until the sugar has dissolved. Then boil rapidly without stirring for for 10 mins or until setting point is reached.
Skim the jelly and pot and seal as quickly as possible. Use within 12 months.
The jelly that I made turned out well and will be enjoyed with hot buttered toast, scones and maybe for a Sunday roast sauce, yum!

Enjoy xx


Monday, 11 June 2012

After the Birthdays and Bunting Came the Crafting


OK so I have been really lapse at posting anything recently, life has been just too exciting so I've had no time to turn on the old laptop. What with Olympic torches, Jubilee celebrations and a birthday or two I have been up to my ears in bunting, flags and cake. However, here I am with a cup of tea by my side contemplating what to do with all of those greetings cards that my friends and family have lovingly sent me. They are so pretty and the notes written inside don't deserve to be discarded lightly, a few even have drawings and greetings by the little people I know practising their handwriting.
Right, what to do with them? All too often they end up in a shoebox and forgotten about, so I was looking for some ideas on line and found a blog or two with some great ideas.

simplemom.net
Turn them into a book, simply punch holes and bind them together. It doesn't have to be just cards, you could keep bits that remind you of a particular person, like letters and ticket stubs. Add little notes and dates if you want and use it as a kind of picture diary for the year.


The Pink Sewing Machine
Grab a tag shaped punch from your local craft store and make beautiful gift tags from old greetings cards.


Atypical Type A
Frame it! Add your fave or sentimental cards to your gallery wall. Make them pieces of art, even the greetings on the inside can look beautiful framed in the right way.


Let me know if you have any ideas yourself.

Have fun x

Tuesday, 15 May 2012

Tuesday Treat - Creamy Coconut Ice

Coconut ice is a childhood favourite of mine, to me it conjures up sunny days at the spring flower shows with the sound of a brass band floating on the air. My dad worked for the Bath Parks & Gardens so, along with mum, was always roped into working the flower show. I practically grew up in the greenhouses, so all the folks at the show knew me and I used to roam the grounds all weekend with a sense of privilege only a 6 or 7 year old can get away with. Bag of homemade sweets from the craft tent in hand I would go to visit the animals, help sell programmes on the gate and get muddy demolishing the big displays at the end of the show. The taste of coconut ice always takes me back there, though it is never quite the same, it was always so creamy and covered in delicious chocolate. What better way to try and escape the rain that is over our shores at the moment than make some coconutty yumminess and dream of summer!!!!

The recipe I have put on here is from the BBC Good Food magazine, it is so simple and makes a great treat. I actually prefer to leave it all white and roll the mixture into a log, then when set it can be dipped in chocolate and sliced. Delicious.

BBC Good Food Magazine

I also had to add this recipe I found for coconut ice cream torte, looks like crowd pleaser!

Taste of Home
Enjoy xx


Related Posts Plugin for WordPress, Blogger...